Most people set up their Pinterest wrong and wonder why nobody sees their pins.
This guide reveals the exact steps successful pinners use to attract thousands of followers and drive real website traffic.
You’ll learn the right way to choose usernames, write compelling bios, create SEO-friendly boards, and pin content that actually gets saved.
Stop wasting time on Pinterest strategies that don’t work.
Follow these proven methods and watch your Pinterest engagement explode within 30 days.
Key Takeaways
-
Profile Setup: Use simple username, clear 160-character bio, high-quality photo (600×600 pixels)
-
Board Strategy: Create 10-15 boards with keyword-rich names, add 20-30 pins before going public
-
Pin Smart: Post 5-10 vertical pins daily (1000×1500 pixels) during peak hours (6-9 AM, 12-2 PM, 8-11 PM)
-
Use Keywords: Research with Pinterest search bar, include main keyword in first 50 characters of descriptions
-
Track Performance: Check analytics weekly, remove low-performing pins after 2-3 weeks, copy what works
Save/Pin the image below👇because I often update my posts. So stay informed with this blog “How to Optimize Pinterest Profile” and save it.
This page have some affiliate links. In other words, if you buy from my links, I may get a commission. Some images were sourced from Unsplash+ (Getty Images)
Ready to Learn How to Start a Thriving Pinterest Blog? Click Here Now
Setting Up a Strong Pinterest Profile
Your Pinterest profile is the foundation of your presence on the platform.
A well-crafted profile helps you connect with your target audience and makes your pins more discoverable.
Choosing the Right Username
When picking a username for Pinterest, I recommend using something that reflects your brand or personality.
Keep it simple, memorable, and easy to spell.
Avoid using numbers or special characters that might confuse people.
Your username appears in your profile URL, so choose something you’ll be happy with long-term.
If you’re a business, try to match your username across all social platforms for consistency.
I’ve found that shorter usernames work better since they’re easier to remember.
If your ideal username is taken, try adding relevant keywords that describe what you do.
For example, if “JaneSmith” is taken, try “JaneSmithDesign” or “JaneSmithPhotography.”
Crafting a Catchy Profile Name
Your profile name is different from your username and appears more prominently on Pinterest.
This name should clearly tell people who you are or what your business does.
I suggest using your actual name or business name here.
You can add a keyword or two after your name to help with searchability.
For instance, “Jane Smith | Interior Design Tips” works well.
Keep your profile name under 65 characters so it doesn’t get cut off in search results.
Using a pipe symbol (|) or bullet point between your name and keywords looks clean and professional.
Including relevant keywords can help the right people find you.
Writing an Engaging Bio
Your Pinterest bio should explain what you do and who you serve in a friendly, conversational way.
I like to keep mine short and sweet—around 160 characters or less.
Include 2-3 relevant keywords that people might search for.
Be specific about the value you provide.
Instead of “I post about food,” try “I share quick 30-minute dinner recipes for busy parents.”
Here’s what I include in my effective bios:
- What I do (My specialty or expertise)
- Who I help (My target audience)
- How I help them (The benefit they get)
- A call to action (What they should do next)
Adding a touch of personality helps you stand out.
Don’t be afraid to use emojis sparingly—they add visual interest to your bio.
Selecting the Best Profile Photo
I’ve found that a clear, high-quality headshot works best for personal accounts.
For business accounts, your logo is usually the way to go.
Make sure your photo is properly sized—at least 600 x 600 pixels.
Pinterest displays profile pictures as circles, so center your image accordingly.
Your face should take up about 60% of the frame if using a headshot.
Smile and make eye contact with the camera to appear approachable and friendly.
Avoid busy backgrounds that might distract from your face or logo.
Good lighting makes a huge difference—natural light from a window works great if you don’t have professional lighting.
Remember to update your photo occasionally to keep your profile looking fresh and current.
Optimizing Your Pinterest Boards
Your Pinterest boards are the backbone of your profile.
The way you organize and present them can make a huge difference in attracting followers and driving traffic to your content.
Creating Relevant Boards
I always start by creating boards that align with my niche and target audience’s interests.
It’s better to have 10-15 quality boards than 50 random ones.
When I’m setting up a new board, I think about what my audience is searching for.
For example, if I’m in the home decor niche, I might create specific boards like “Modern Living Room Ideas” instead of just “Home Decor.” (More on this soon.)
Each board should have at least 20-30 pins before making it public.
This gives new visitors enough content to browse when they discover your boards.
I also organize my boards strategically, placing the most important ones at the top of my profile.
Pinterest lets you drag and drop to rearrange them easily.
Naming Boards for SEO
Board names matter a lot for Pinterest SEO.
I use keywords that people actually search for rather than cute or clever names.
For instance, “Yummy Stuff” gets less visibility than “Easy Healthy Pork Recipes”.
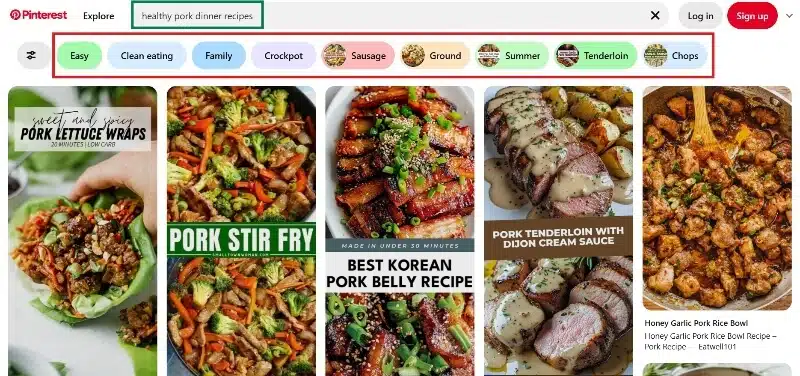
You can easily research keywords using Pinterest’s search bar suggestions to see what’s popular.
The nice thing.
Pinterest shows related keywords under the search bar.
These help people find exactly what they’re looking for.
I keep board names clear and specific, usually 2-5 words long.
Including keywords in the board description helps too.
Here’s a simple formula I follow:
- Main keyword + supporting keywords
- Example: “Healthy Breakfast Ideas Under 30 Minutes”
Customizing Board Covers
This section here is for the people who wants to maintain a certain personal style and brand across the Pinterest platform.
Custom board covers will make your profile look way more professional and cohesive.
You can create covers that match your brand colors and style.
To do this, you can use tools like Canva to design simple board covers in the right dimensions (800 x 800 pixels works best).
Adding text to the cover image helps users instantly understand what the board is about.
For a consistent look, use the same template for all your covers, just changing the text and maybe the background image for each board.
Then upload your custom covers directly when editing the board.
Lastly, this is an optional step. Personally, I don’t have any covers for my board.
Pinning Strategies for Better Visibility
Getting your pins seen by more people takes some smart planning and a few insider techniques.
I’ve found these strategies make a huge difference in how many people discover my content.
Scheduling Regular Pins
I make sure to pin content consistently rather than dumping dozens of pins all at once.
Pinterest’s algorithm favors accounts that show regular activity.
I aim for 5-10 pins daily, which keeps my profile active without looking spammy.
Using a scheduling tool like Tailwind or Pinterest’s built-in scheduler has been a game-changer for me.
I can plan a week’s worth of pins in one sitting and let the tools post them at optimal times.
The best times I’ve found for pinning are mornings (6-9 AM), lunch hours (12-2 PM), and evenings (8-11 PM).
But I always check my Pinterest analytics to see when my specific audience is most active.
Pinning High-Quality Images
I never underestimate the power of great visuals on Pinterest.
My best-performing pins have these qualities:
- Vertical orientation (2:3 ratio, ideally 1000 x 1500 pixels)
- Bright, clear images with good lighting
- Text overlay that explains what the pin is about
- Clean, readable fonts that look good on mobile
I also make sure my images are properly sized.
Pinterest recommends aspect ratios between 2:3 and 1:3.5, with a minimum width of 600 pixels.
When I create pins myself, I use tools like Canva or even Kittl that have Pinterest-specific templates.
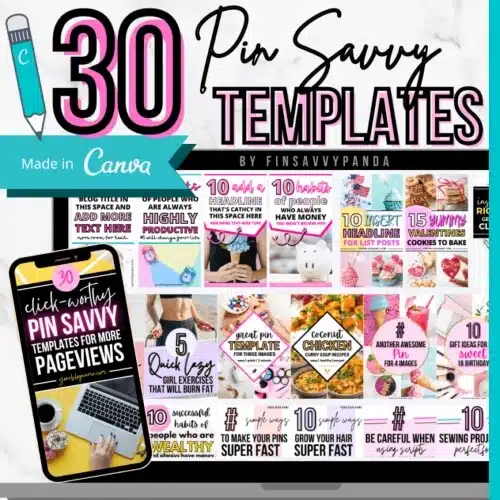
🎨 Need Help With Pinterest Graphics? Use Templates!
Making good-looking pins takes time.
Not all of us have hours to sit in Canva creating designs from scratch.
And coming up with new ideas for pins every week?
That gets tiring too.
💡 Here’s a Shortcut That Saves Hours:
Use Pinterest templates!
I use this Viral Pinterest Template bundle for Canva, which has saved me hours of headaches.
It’s perfect for busy bloggers who want to:
- Save time on design
- Create click-worthy pins faster
- Stay consistent without burnout
✅ Why These Templates Work:
- Made for bloggers by a blogger
- Fully customizable in free Canva
- Designs that actually get clicks
- Batch create pins in minutes, not hours
You just drag, drop, tweak the text ... and boom! Done.
👉 Grab your viral Pinterest templates here and start creating pins the easy way!
Using Rich Pins
Rich Pins automatically sync information from my website to my pins.
I use them because they give extra details that make my pins more valuable and clickable.
There are four types I can choose from:
- Product pins – show real-time pricing and availability
- Recipe pins – include ingredients, cooking times, and servings
- Article pins – display headline, author, and description
- App pins – let people install apps directly
Setting up Rich Pins took me about 20 minutes.
Here’s a step-by-step guide on how to claim your website for Rich Pins.
I had to add metadata to my website and apply for Rich Pins through Pinterest.
The extra effort was totally worth it—my click-through rates jumped by about 15% afterward.
Using Keywords Effectively
Keywords are the secret sauce to making your Pinterest profile discoverable.
And using the right keywords in the right places helps more people find your posts.
Conducting Keyword Research
I always start by thinking about what my target audience might be searching for.
Pinterest’s search bar is actually a goldmine for keyword research!
Pinterest wants you to use these suggested words because they help the right people find your posts.
This search feature is the best way to find keywords that will help more people see your pins.
So, pay attention to the suggestions that pop up.
For example, if I’m a food blogger, typing “healthy recipes” might show suggestions like “healthy recipes easy” or “healthy recipes for weight loss.”
I also check out my competitors’ profiles to see what keywords they’re using.
This gives me ideas I might have missed.
Pinterest Trends is another awesome tool I use.
It shows me what topics are currently popular, which helps me ride the wave of trending searches.
Adding Keywords to Pin Descriptions
I make sure my pin descriptions are packed with relevant keywords without sounding spammy.
The first 50-60 characters are super important since that’s what shows up in feeds.
I try to include:
- My main keyword in the first sentence
- 2-3 related keywords throughout the description
- Hashtags (but only 2-3 relevant ones)
Instead of just writing “Chocolate cake recipe,” I write “Easy chocolate cake recipe for birthdays – moist and perfect for beginners.”
I also use natural language.
Pinterest’s algorithm is smart enough to understand context, so I don’t need to stuff keywords awkwardly.
Optimizing Board Descriptions
My boards are like little keyword hubs!
I give each board a clear, searchable name that includes my main keyword.
In the board description, I include:
- A brief explanation of what people will find
- 3-5 relevant keywords naturally woven in
- Why this collection is valuable
I update my board descriptions regularly based on seasonal trends.
For instance, my “Home Decor” board might emphasize “cozy fall decor” in September and “holiday decorating ideas” in November.
I also arrange my boards strategically, putting the most relevant ones to my niche at the top of my profile.
This helps Pinterest understand my specialty right away.
Leveraging Pinterest Analytics
Pinterest Analytics is a goldmine of information that can supercharge your pinning strategy.
I use these insights to make smart decisions about what to post and when to post it.
Tracking Profile Performance
I check my profile metrics at least once a week to stay on top of my Pinterest game.
The main page shows me key numbers like how many people viewed my posts each month, new followers, and how much people liked my content.
I pay special attention to the audience demographics section.
This tells me who’s looking at my content – their age, gender, and where they’re from.
Knowing this helps me create pins that my audience will love.
Another key metric I watch is engagement rate.
This shows me how many people are actually interacting with my pins, not just viewing them.
The device breakdown is super useful too.
If most of my audience is on mobile, I make sure my pins look great on smaller screens.
Identifying Top-Performing Pins
I regularly check which of my pins are getting the most love.
This helps me figure out what’s working and what’s not.
When I look at my top pins, I ask myself:
- What topics are performing best?
- Which pin designs get more clicks?
- What time of day gets more engagement?
I use the Pin Inspector tool to dig deeper into individual pin performance.
This shows me detailed stats on impressions, saves, and outbound clicks.
One trick I’ve found helpful is creating similar pins to my top performers.
I’ll use the same color scheme or layout but with fresh content.
I also track seasonal trends in my analytics.
This way, I can plan ahead for holidays or special events that might boost engagement.
Maintaining and Refreshing Your Profile
Keeping your Pinterest page updated is key to getting more followers and likes.
Posting regularly and planning your content really helps my Pinterest do better.
Regularly Updating Boards
I make it a habit to update my boards at least once a week with fresh pins.
This keeps my profile active and signals to the Pinterest algorithm that I’m an engaged user.
When I add new pins, I try to do it at peak times when my audience is most active.
Here’s an interesting stat from SocialBee:
For the best results on Pinterest, aim for three posts daily, and avoid posting more than 30 times per day. The best times to post are Tuesday to Saturday at specific time slots, like 9 AM, 12 PM, 1 PM, and 6 PM.
I also reorganize my boards every few months.
This means moving my seasonal content to the top during relevant times of year.
For example, I put my holiday boards front and center in November and December.
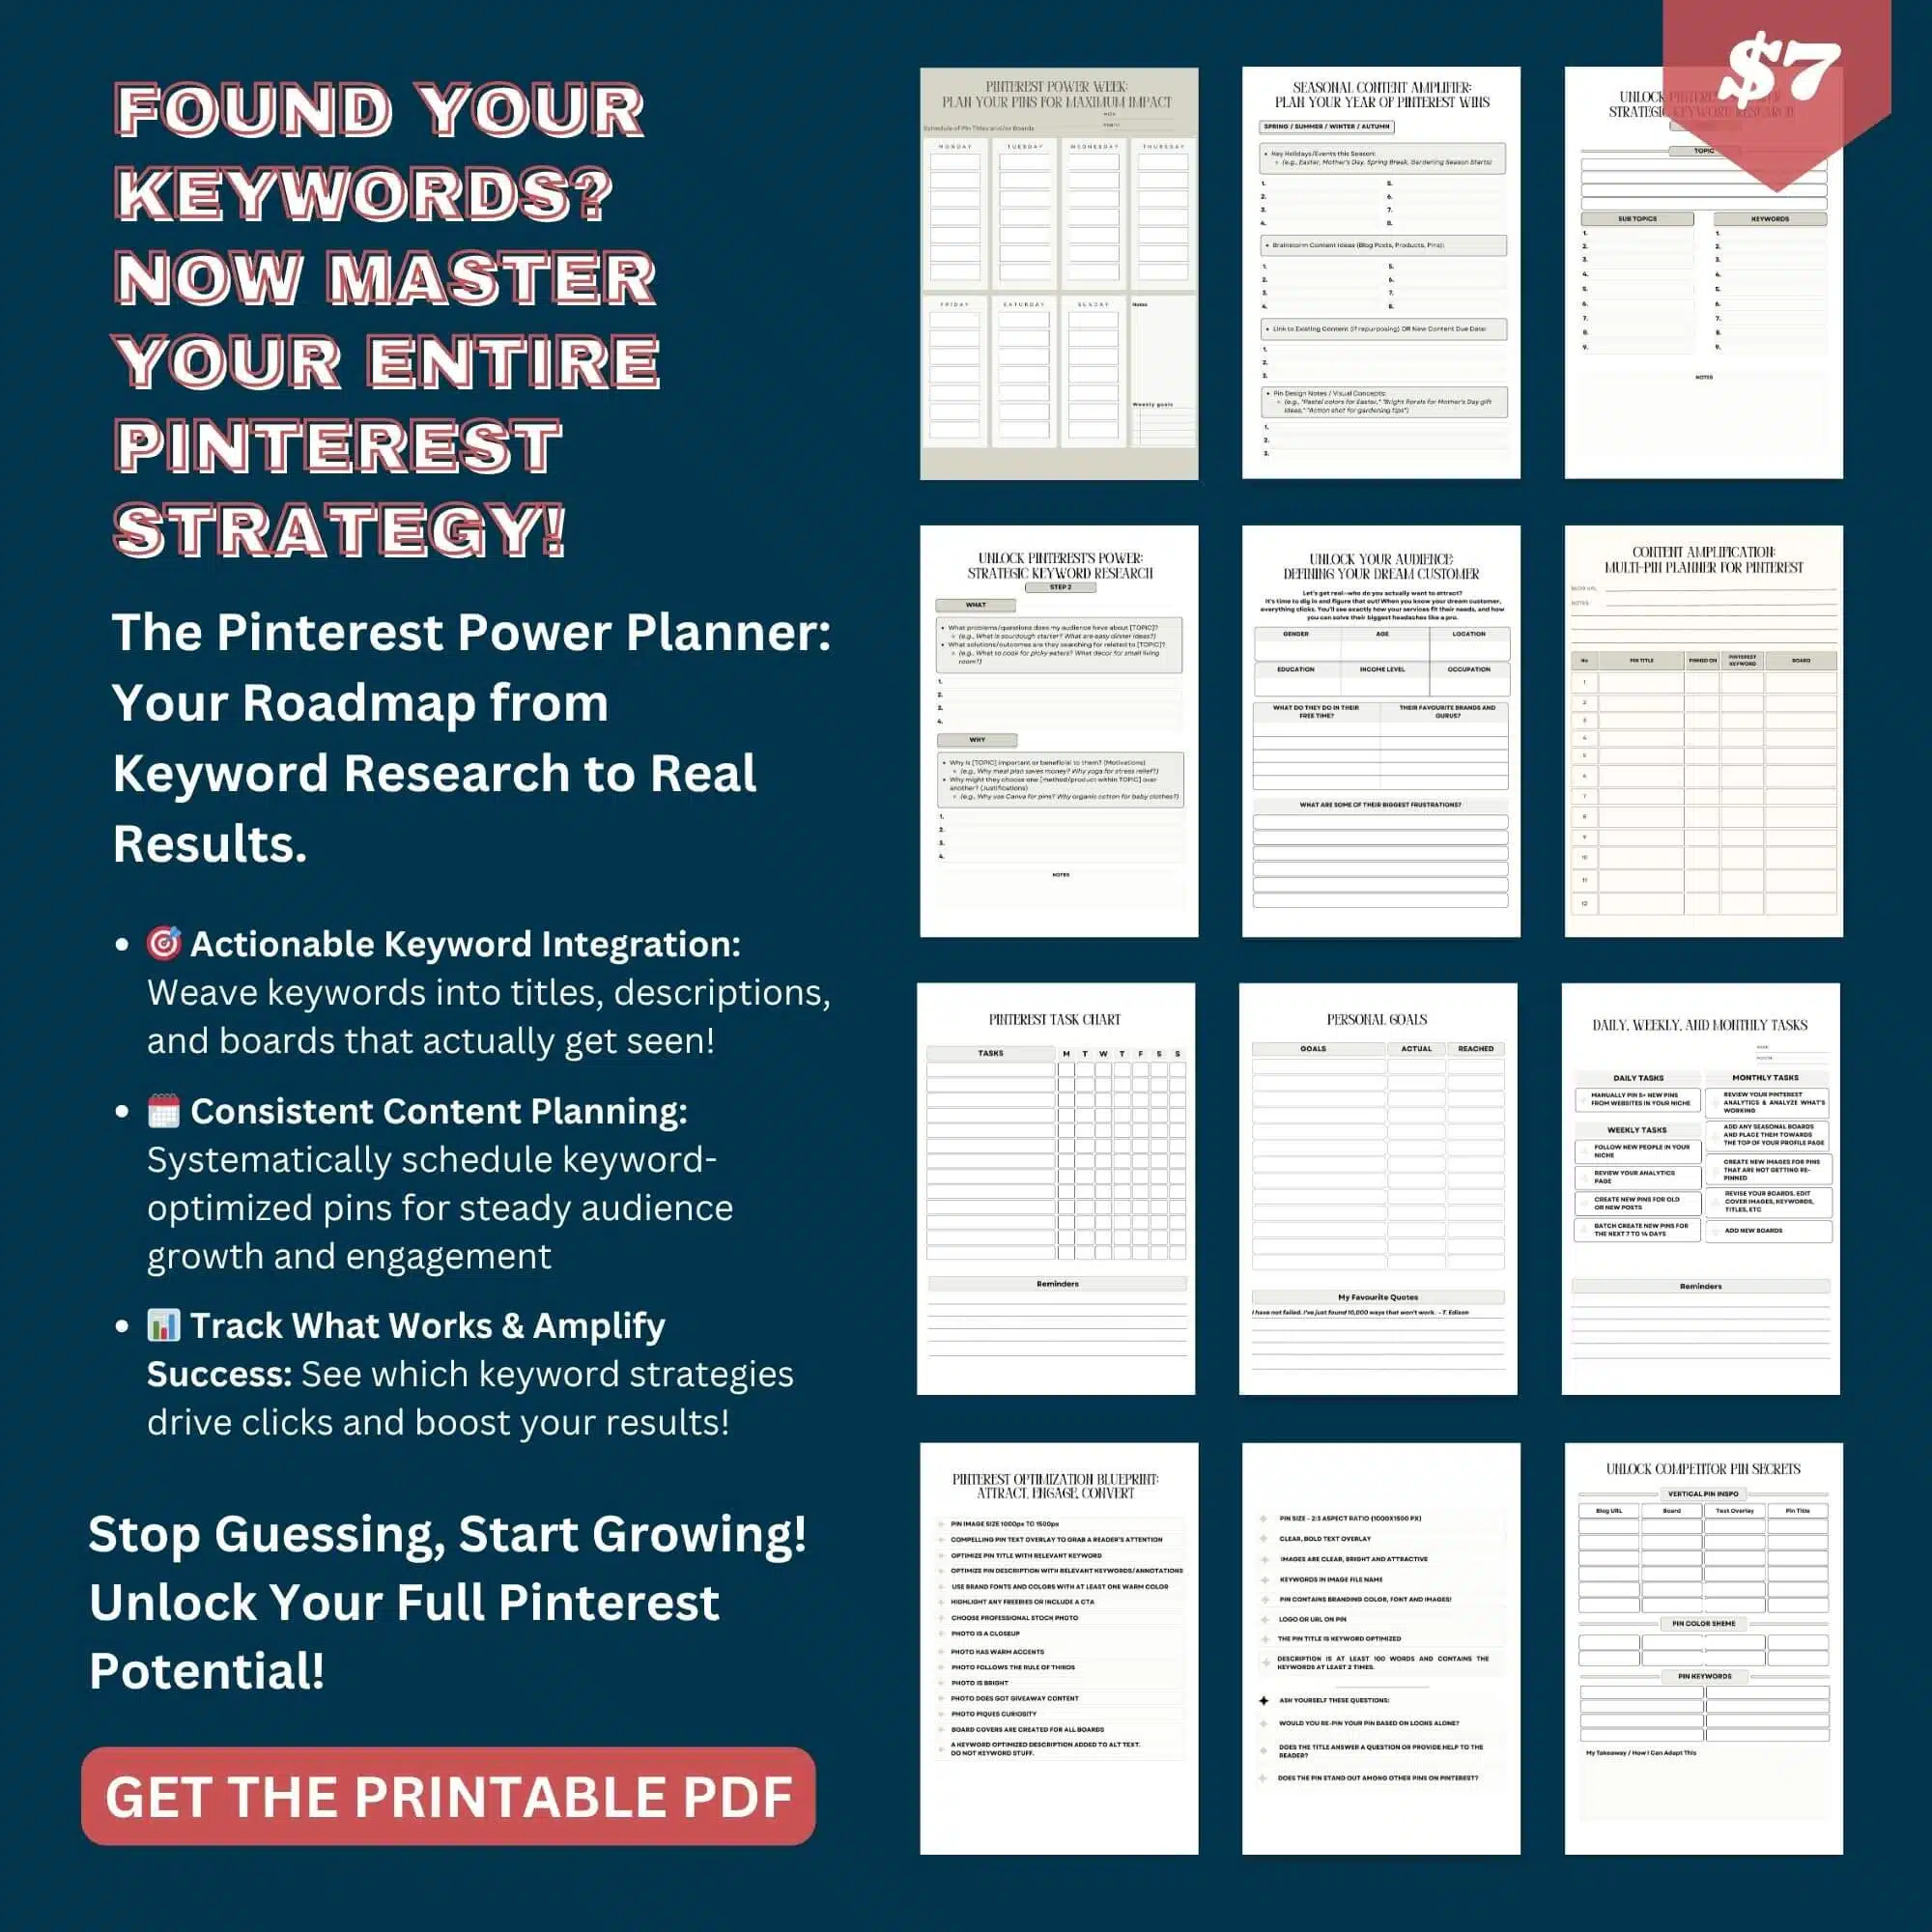
Quick tip: Create a content calendar to remind yourself when to refresh specific boards.
I use a simple planner with board names and update schedules.
Real Quick
By the way, if you need a planner to stay organized with your weekly pins and keywords, then check out this Printable Power Planner below👇👇👇
Removing Underperforming Pins
I regularly check my Pinterest analytics to identify pins that aren’t performing well.
Pins with low impressions or engagement after 2-3 weeks are usually candidates for removal or improvement.
Before deleting underperforming pins, I try to understand why they’re not working:
- Is the image quality poor?
- Is the description unclear?
- Does it match my audience’s interests?
Sometimes I’ll try updating the pin with a better image or more compelling description before removing it completely.
I’ve also found that archiving pins instead of deleting them can be smart.
This keeps my profile clean while preserving the content for future reference or repurposing.
How to Optimize Pinterest Profile : The Wrap
The tips in this guide work because they give Pinterest what it wants: good content, regular posting, and the right keywords.
Start by fixing your profile basics like your username, bio, and photo.
Then make boards with names people actually search for and post good vertical pictures every day.
Use Pinterest’s search bar to find keywords that work.
Check your stats each week and do more of what gets results.
These simple steps will teach you how to optimize Pinterest profile the right way.
Ready to Learn How to Start a Thriving Pinterest Blog? Click Here Now
Disclosure: This post may contain affiliate links, which means I’ll receive a commission if you purchase through my links, at no extra cost to you. Please read full disclosure for more information.
You Might Want to Check This Out Too
Resources To Grow Your Business With
Pinteresting
Struggling to get traffic from Pinterest? Pinteresting Strategies 2025 by Carly Campbell reveals a manual pinning method that works—even with algorithm changes.
This course walks you through step-by-step strategies to pin effectively, increase engagement, and grow your blog without relying on expensive schedulers.
Carly has used this exact system to bring in 100,000+ page views in just months, and now she’s sharing it with you.
Stop guessing and start seeing real results today!
Bluehost
Bluehost is a great starting point for beginners or bloggers who want to switch to a reliable web hosting service. And it gives you the best bang for your buck - starting at $2.95 a month*.
With the entry-level hosting plan, you'll get a high up-time, reliable customer support, FREE domain name (first year) and 30 day money back guarantee.
You can sign up with Bluehost here.
WPX Hosting
It's a web-hosting service I love using. It specializes in WordPress hosting, and depending on what package you opt for, you can host 5 or more sites on one account. The best bit is - the quick turnaround in support is top notch.
For bloggers who have an established blog, this is a fantastic option.
You can learn more about this service here.
Aweber
Building an email list of a growing audience is essential for the longevity of any business. This autoresponder service is easy to use, and it is a great starting point for someone looking to kickstart their email campaign.
Hi, I’m Jason Ou (surname aka, Oh). I am a Solopreneur and Blogger. My mission is to help fellow entrepreneurs (like you) to profit from their passion online. Let’s connect on Facebook now.
